Sometimes you need to make adjustments to a preset. If you find yourself frequently making the same adjustments, maybe it is time you modify the presets you use and make those adjustments permanent.
We have you covered!
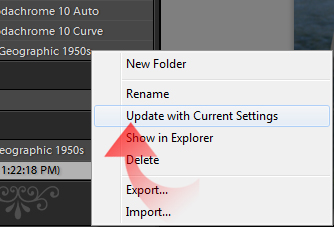
The easiest way to modify a preset is to make your adjustments to your image and then right-click {cmd+click} on the preset you want to alter.
Then, from the contextual menu click on Update with Current Settings.
When the Update Develop Preset dialog opens, simply click Check All then uncheck all the features you do not want the preset to alter.

Click Update, and you are done. The preexisting preset has been updated.
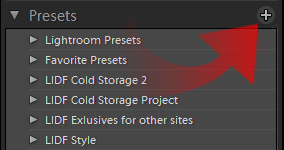
However, why would you overwrite a preset, when you can just make your own, special version of it? This is a much better solution, as you still have access to the original, yet can create a new preset derived directly from the existing one. Again, apply the preset you want to start with. However this time, click the (+) icon in the Presets toolbox {Ctrl/Cmd +Shift + N}.
This brings up the New Develop Preset Dialog. It is pretty much identical to the Update Develop Preset dialog, so again click Check All and proceed to uncheck all the features your new interpretation of the preset does not need to adjust.
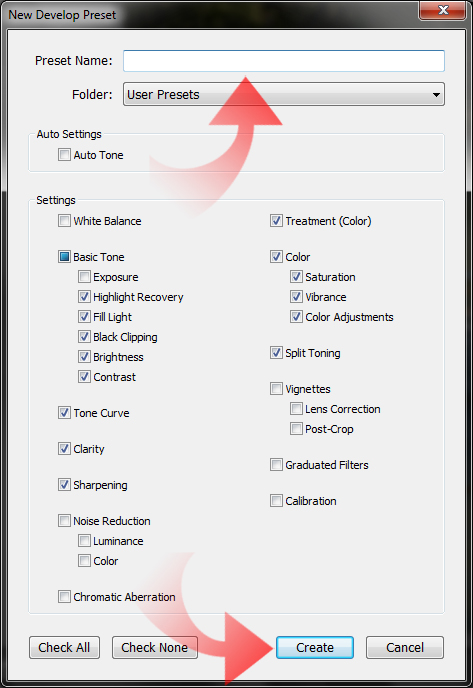
Just make sure to name your preset at the top of the dialog box and choose which preset folder you wish to deposit it into.
But what if you have two presets that you would like to combine? Simple, just follow the procedure above to create a new preset copying the functionality of the first preset you want to combine. When you save the preset, make sure to only check the preset features you want this half of the preset applies. You only want it to apply those select changes, if not we will not be able to merge presets.
Once your new preset is saved, revert your image back to its import state or choose another image. Apply the second preset you wish to combine. Immediately afterwards, apply the preset you just created.
Essentially you applied every setting of the second preset and then applied only the features you want from the first preset over it, essentially combining the two together. Now use the Update with Current Settings option described above. Select only the features you want your new combined preset to apply to your images. Click Update, and you have successfully merged the two presets into one new preset.
Always be aware when making or modifying presets that you only select the features required to apply your desired effect. The less settings adjusted by a preset the better it will “stack” with other well-designed presets. If you apply a poorly designed preset first and then overlay you new presets, you will see only your desired alterations take place. That is good for preset compatibility. Compatibility is your friend.


